 This is the top you are looking for.
I make various adaptors to fit the standard keg top. These are all based on a Copper ferrule. This includes such things as a plain 54mm copper pipe of about 100mm in length a 35mm long pipe with a couple attached so you can drop your column into it. There is also a 2.5” to 2” / 54mm one. If you would like a different size please ask. Most kegs whether they are 100lt or 50lt have the same size top.
This is the top you are looking for you are unlucky and get one with the triangle top it will need to be cut off and a stainless steel ferrule welded in place. When sourcing your keg purchase or otherwise take special note of the top. You need the ones with a lip on the top that a tri-clamp will fit. ( See photo. ) The adaptors are all made in copper and can be found in the copper section.
The Stainless Steel Keg Adapters are brazed onto the copper coupler and as such sometimes leaves burn marks on the Ferrule. This does affect the way the ferrule works or the seal you get. It’s just an aesthetic thing.
Tri Clamps
2″ 2.5″ 3″ & 4″. 2″ Fits the 54mm Copper Pipe. 2,5″ Fits the 67mm Copper Pipe. 3″ Ferrules have been specially machined to fit the 76mm Copper pipe. Most if not all 3″ ferrules are the same size as the pipe and as such have to be used with a coupler. Not any more, these 3″ 76mm ferrules actually fit inside the pipe. 4″ Fits the 104mm Copper Pipe. Again these ferrules are here in the UK just a few days away not weeks away.
 Stainless Ferrules just as they arrived.
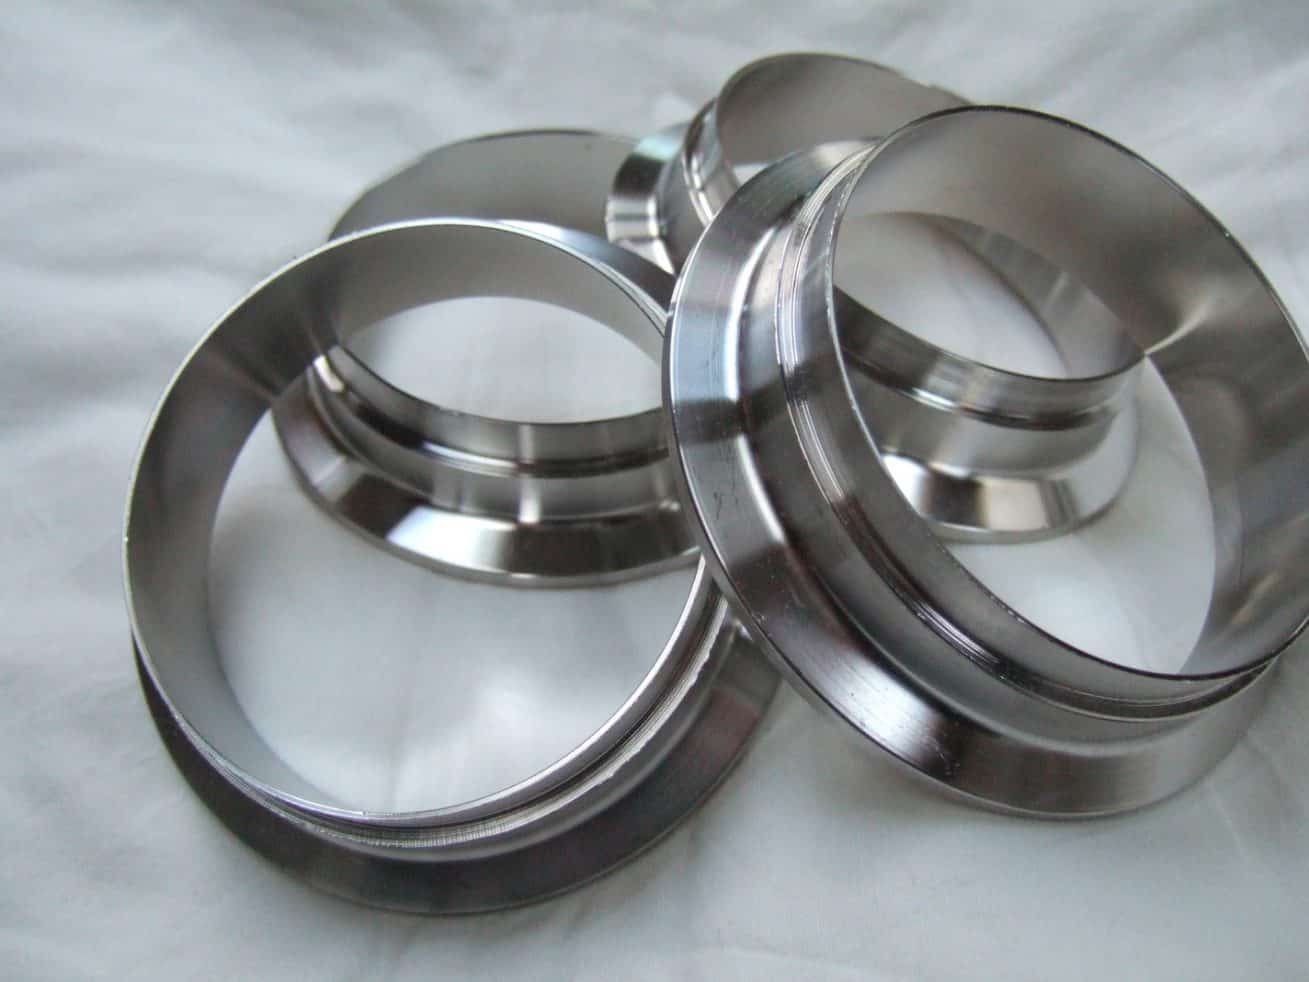 Steel Ferrules 3 inch specially machined.
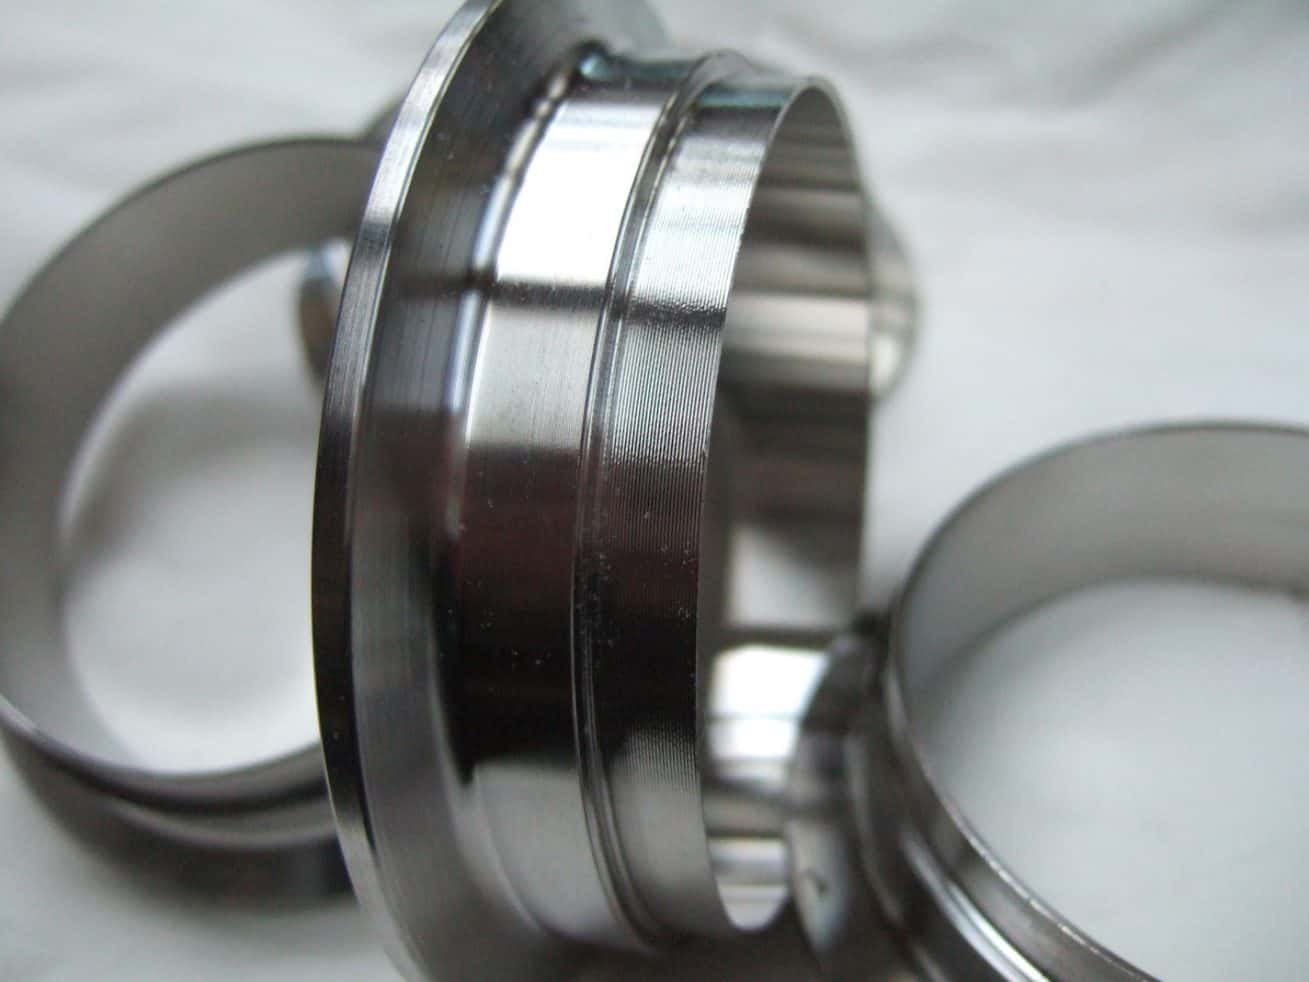 Stainless Steel Ferrules 3 inch / 76mm suits 73mm ID copper tube.
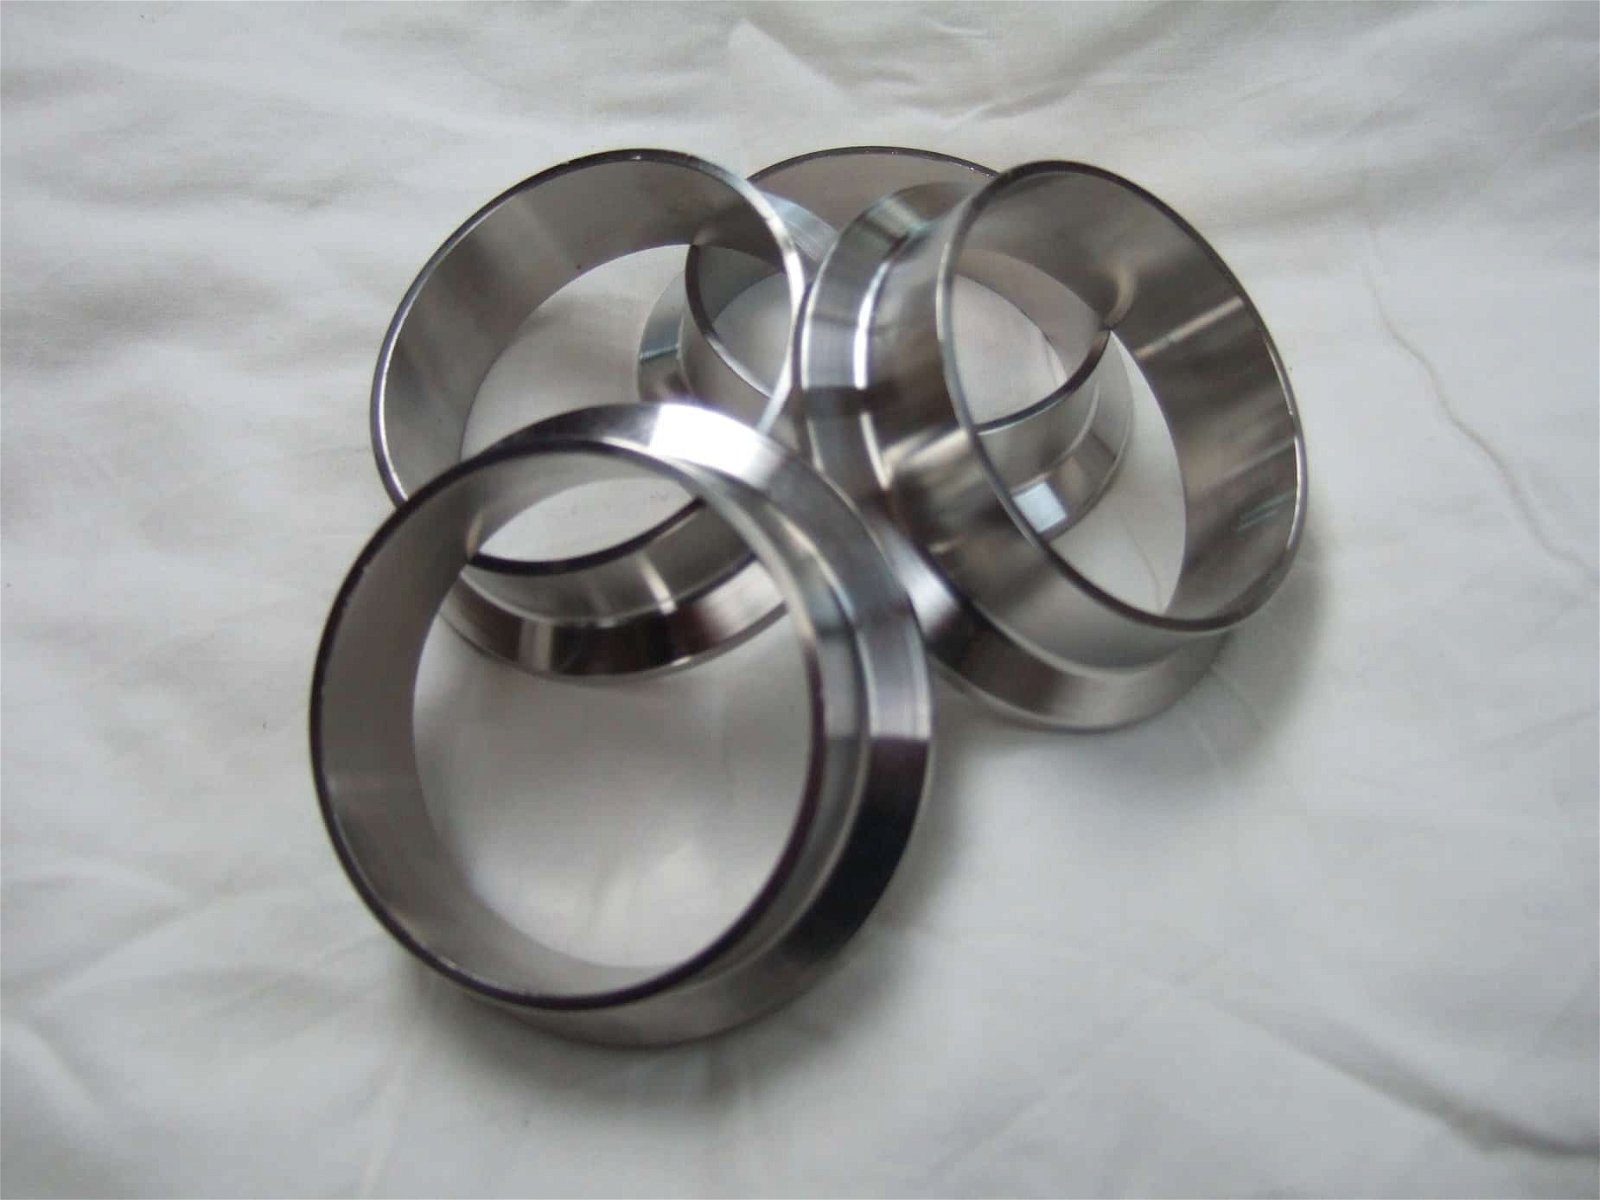 Stainless Steel Ferrules 2 inch/54mm suits 51mm ID copper tube.
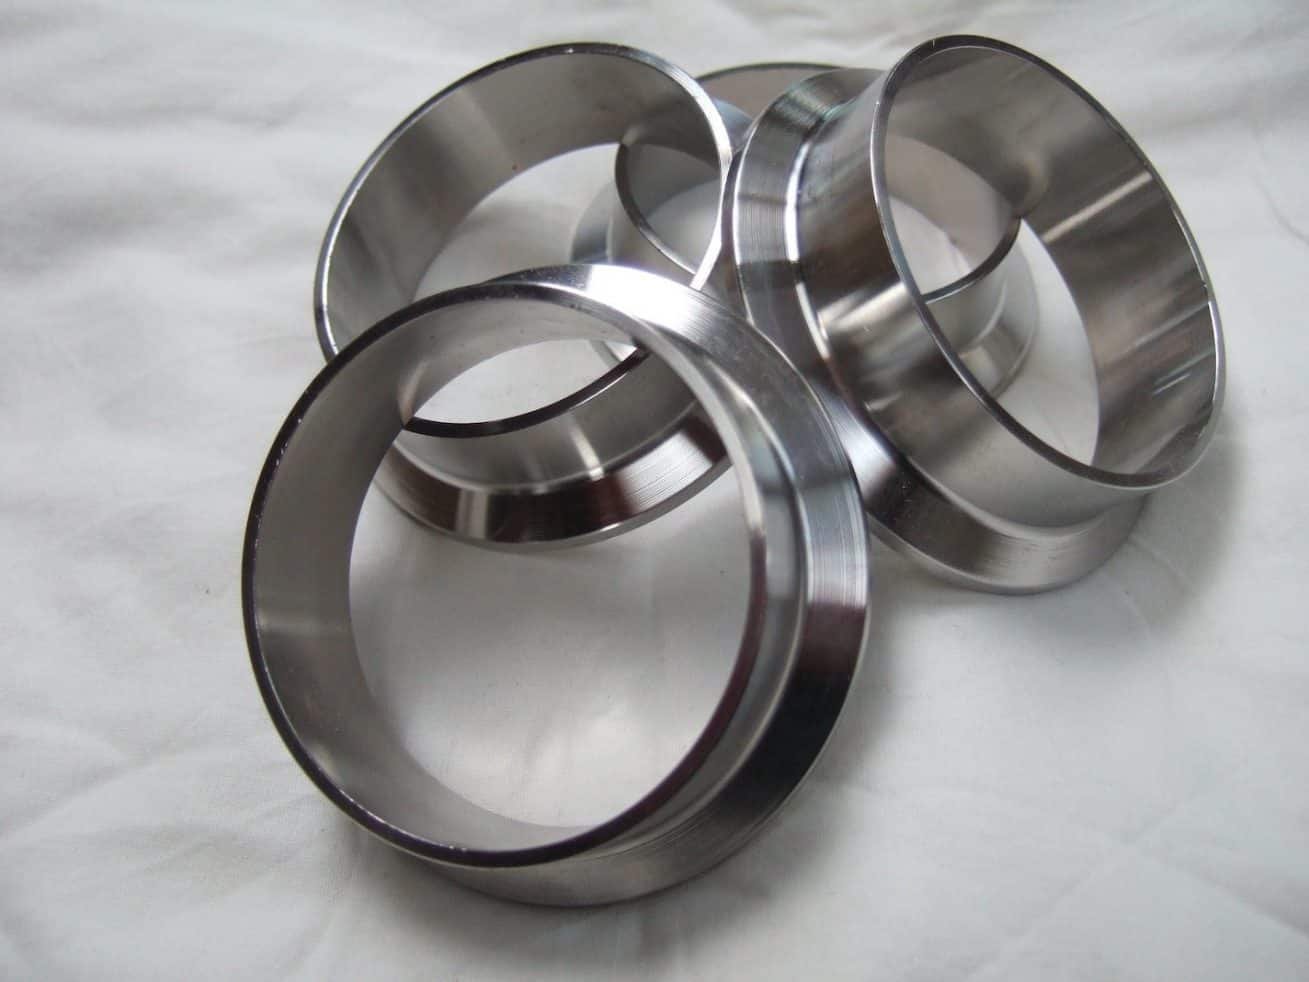 Stainless Steel Ferrules 2.5 inch/ 64mm suits 67mm ID copper tube.
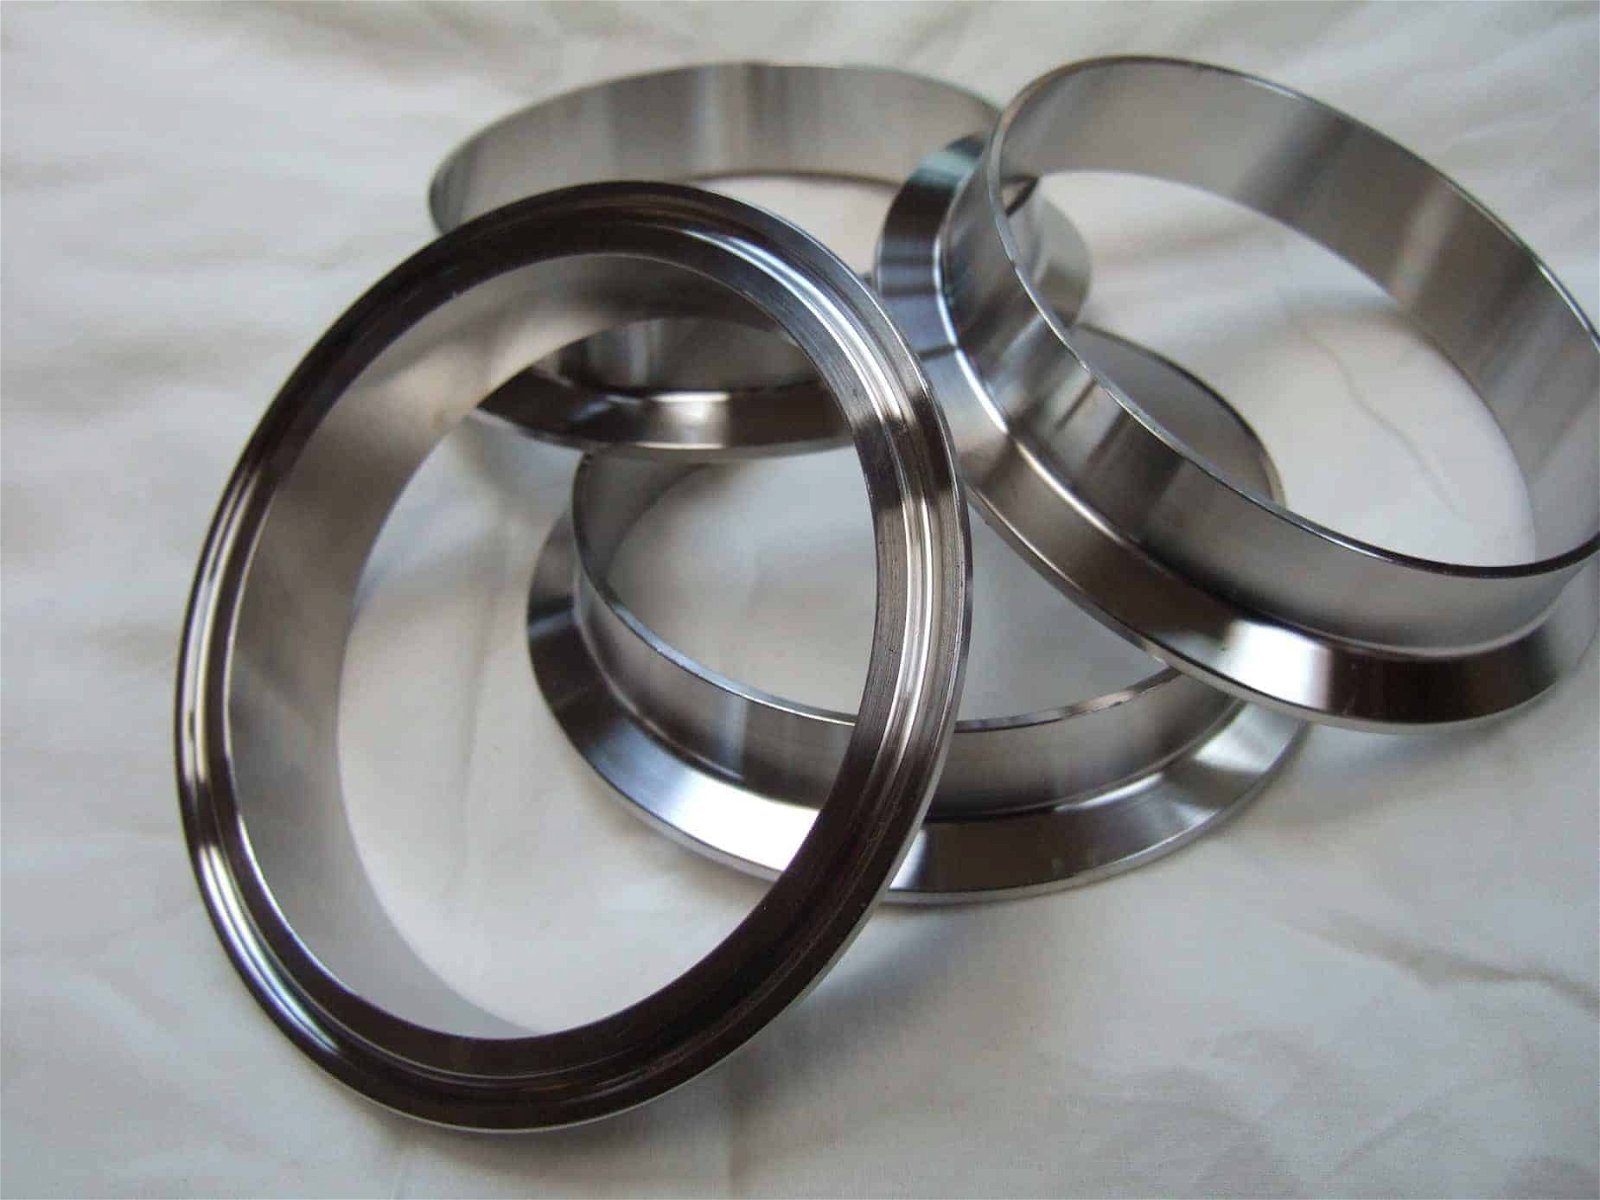 Stainless Steel Ferrules 4 inch /108mm suit 104mm ID copper tube.
Lid Clips
Keg Top Flanges.
At long last, they are here. Due to a customs hiccup, they took a month to get here. Unfortunately, the manufacturer did not grasp the situation quite fully and did not weld the nuts and bolts as I had asked. When informed of this they wanted almost as much to do that as they charged to do the job in the first place.
I am not a welder. I have tried. If you or a friend can weld stainless steel then by all means weld the flange to the keg.
I can supply everything in a kit form and you can do your own or get a friend to do it. These are a little fiddly to fit the first time you do it but you soon get to grips with the best way of doing it.
The beauty of this is that the hole you cut in the top of the keg is about 4.0″ or 4.5″ depending on the footprint of your jigsaw. You can then get your arm in the keg to fit other items such as tap nuts, electrical element nuts, etc. Plus you are able to clean the inside. Don’t forget to de-burr any holes you make, failure to do so could come back and bite.
To fit the Flange you will need to cut a hole in the top of the keg. Make sure you have degassed it. No need to remove the spear as it will come out anyway. First drill a hole that will allow you to get a jigsaw blade in. I can supply the S.S. Blade for £4.00 if bought at the same time. Use the top spear adaptor/neck the bit that sticks up as a guide for the jigsaw see Keg Adapters in this section. Just run the jigsaw around the top of the keg using the spearhead as a guide. Put the jigsaw on the lowest slowest speed it will do. Get a friend to do it or yourself with a water spray bottle to continuously spray the blade so it does not get hot. Next, after the hole is cut place the outside of the flange with the stainless ferrule on the center over the hole. Mark the holes. Centre punch the marked holes so the drill does not wander. Put the drill on as slow as it will go. Then squeeze the trigger to half the slow speed of that setting or less. Squirt water all the time you are drilling.
The nuts and bolts are 8mm. You need to make the holes about 9.0 to 9.5mm to allow for movement and miss alinement. With stainless steel, everything needs to be done at a snail’s pace. SS – Stainless Steel = Snail Slow. If you make it too hot it just gets harder and far more difficult to work with. Cool and slow. Hot and fast you don’t get anywhere, only frustrated. Ignore the folks that tell you to use some sort of oil. Water is the best for coiling. You can’t see when oil is getting hot until it has got so hot it starts to smoke. The damage is done by that time. You have effectively hardened the steel. Water is by far the best way to go when the first wisp of steam appears, stop or just squirt more water. Works a treat. As the saying goes slowly, slowly, catchy monkey. Fast and furious just F***s it up.
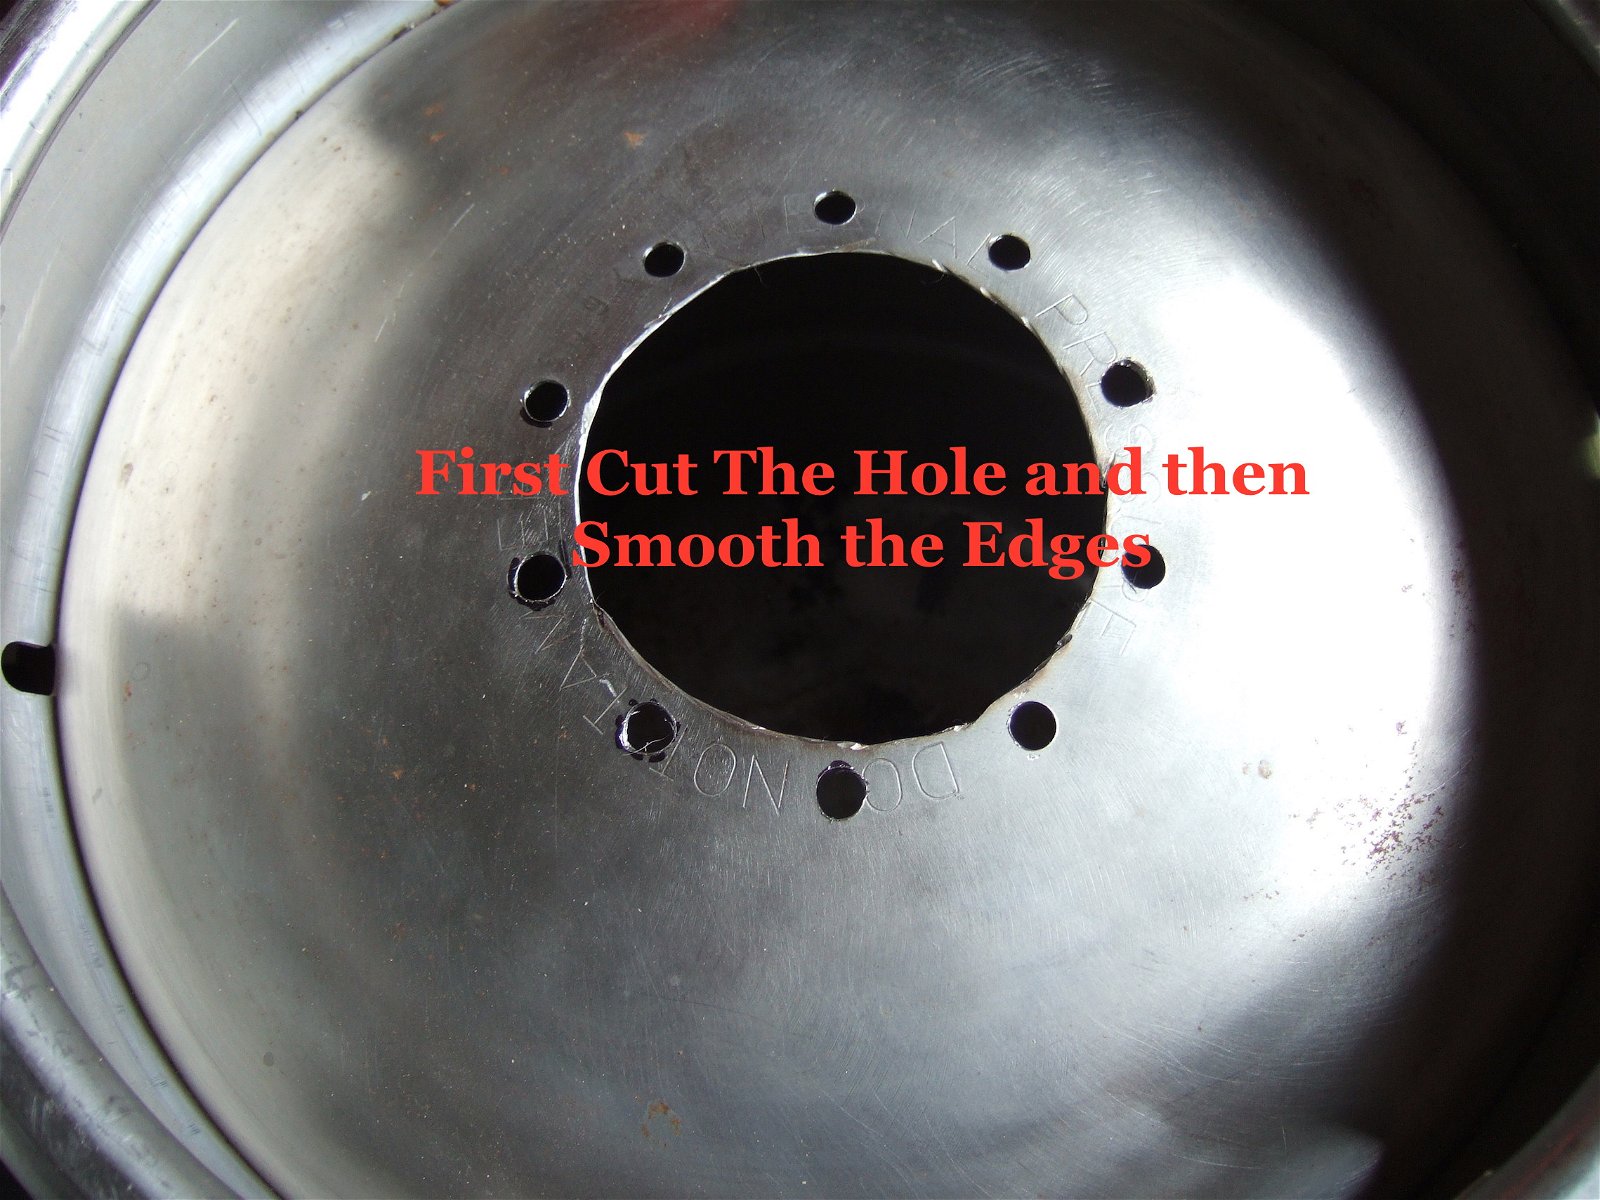 Cut the Hole in Keg
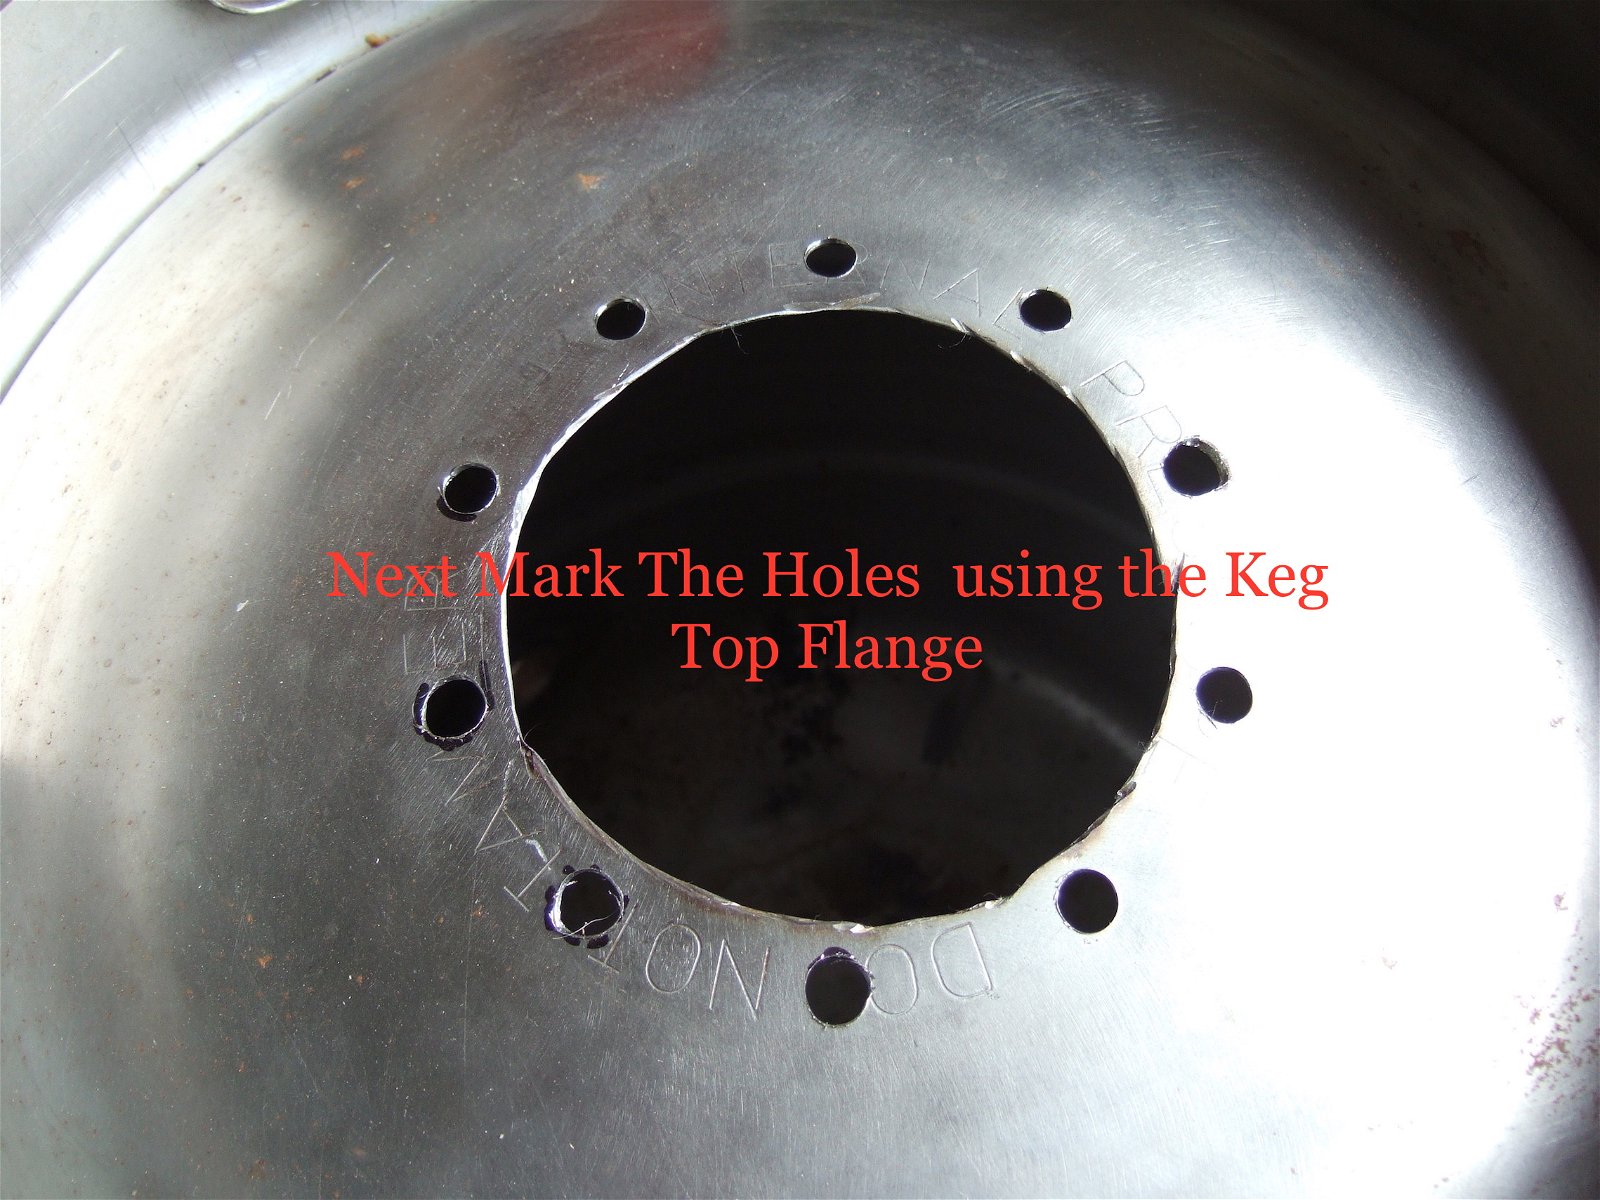 Smooth the edges of the hole so they do not come back to bite you.
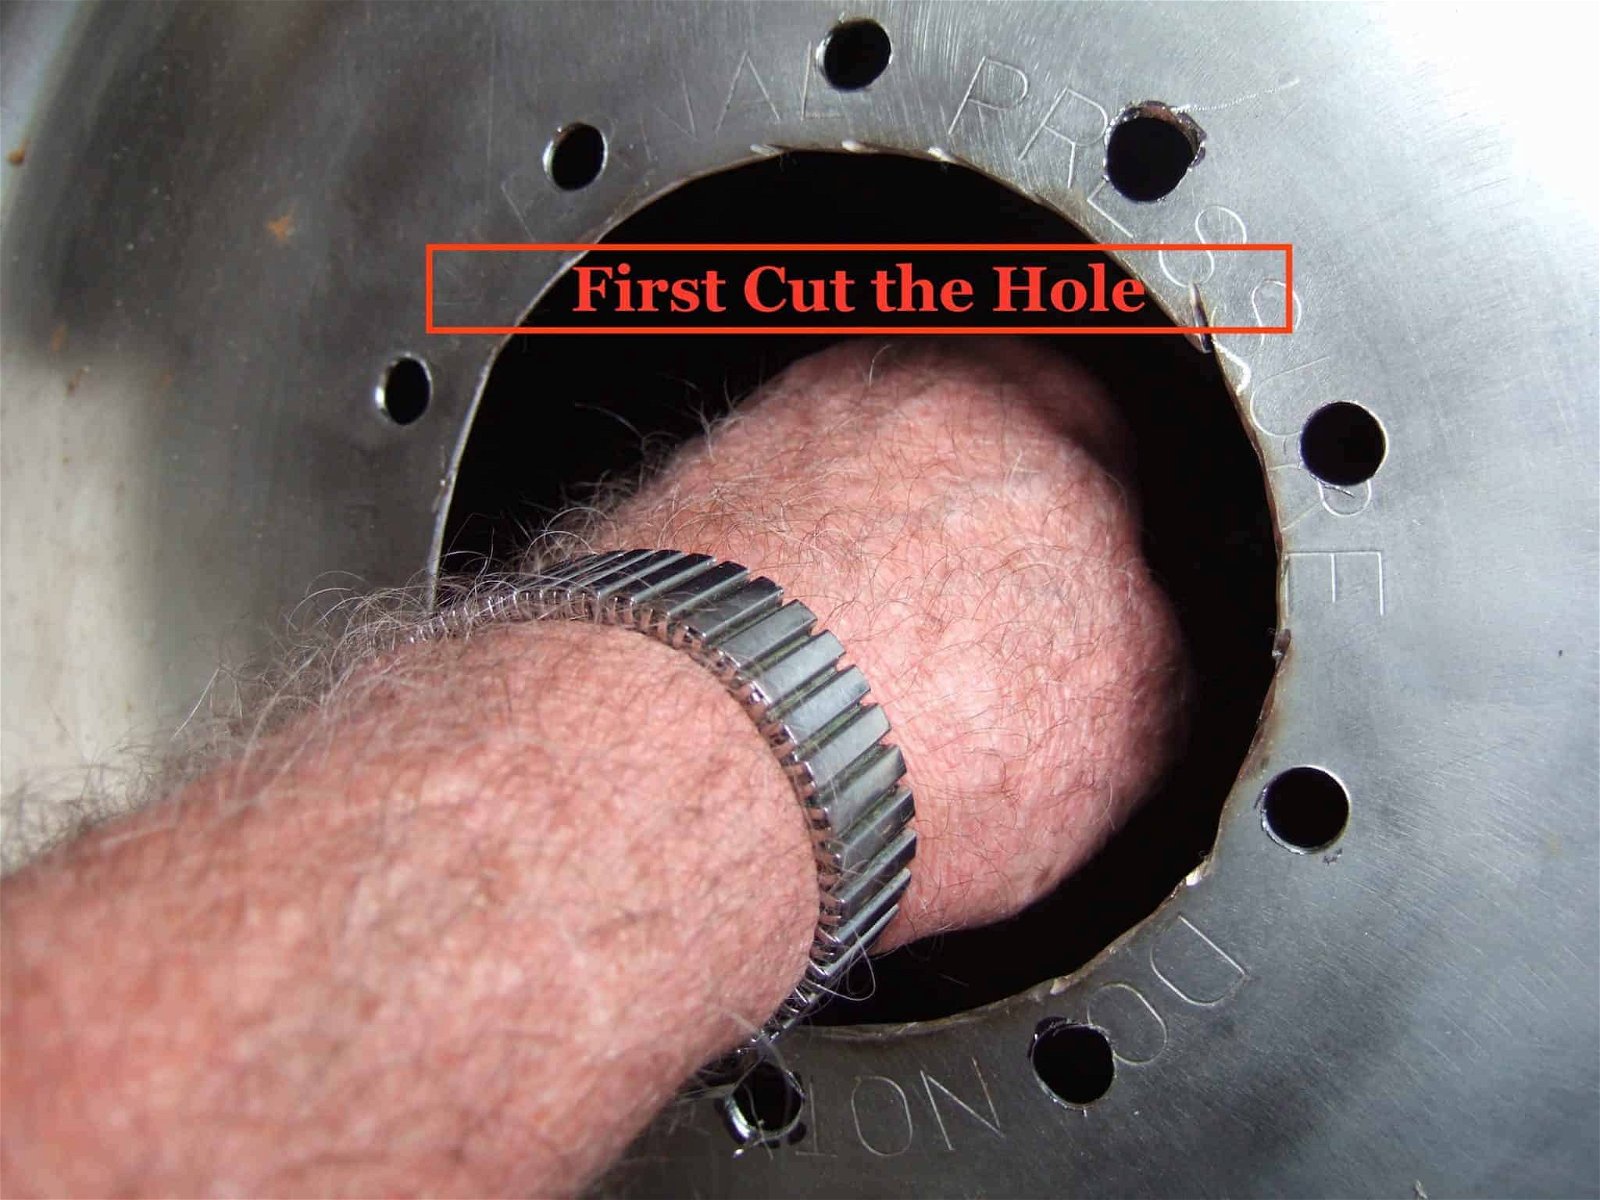 Cut your hole about 120mm in Ø & smooth the edges
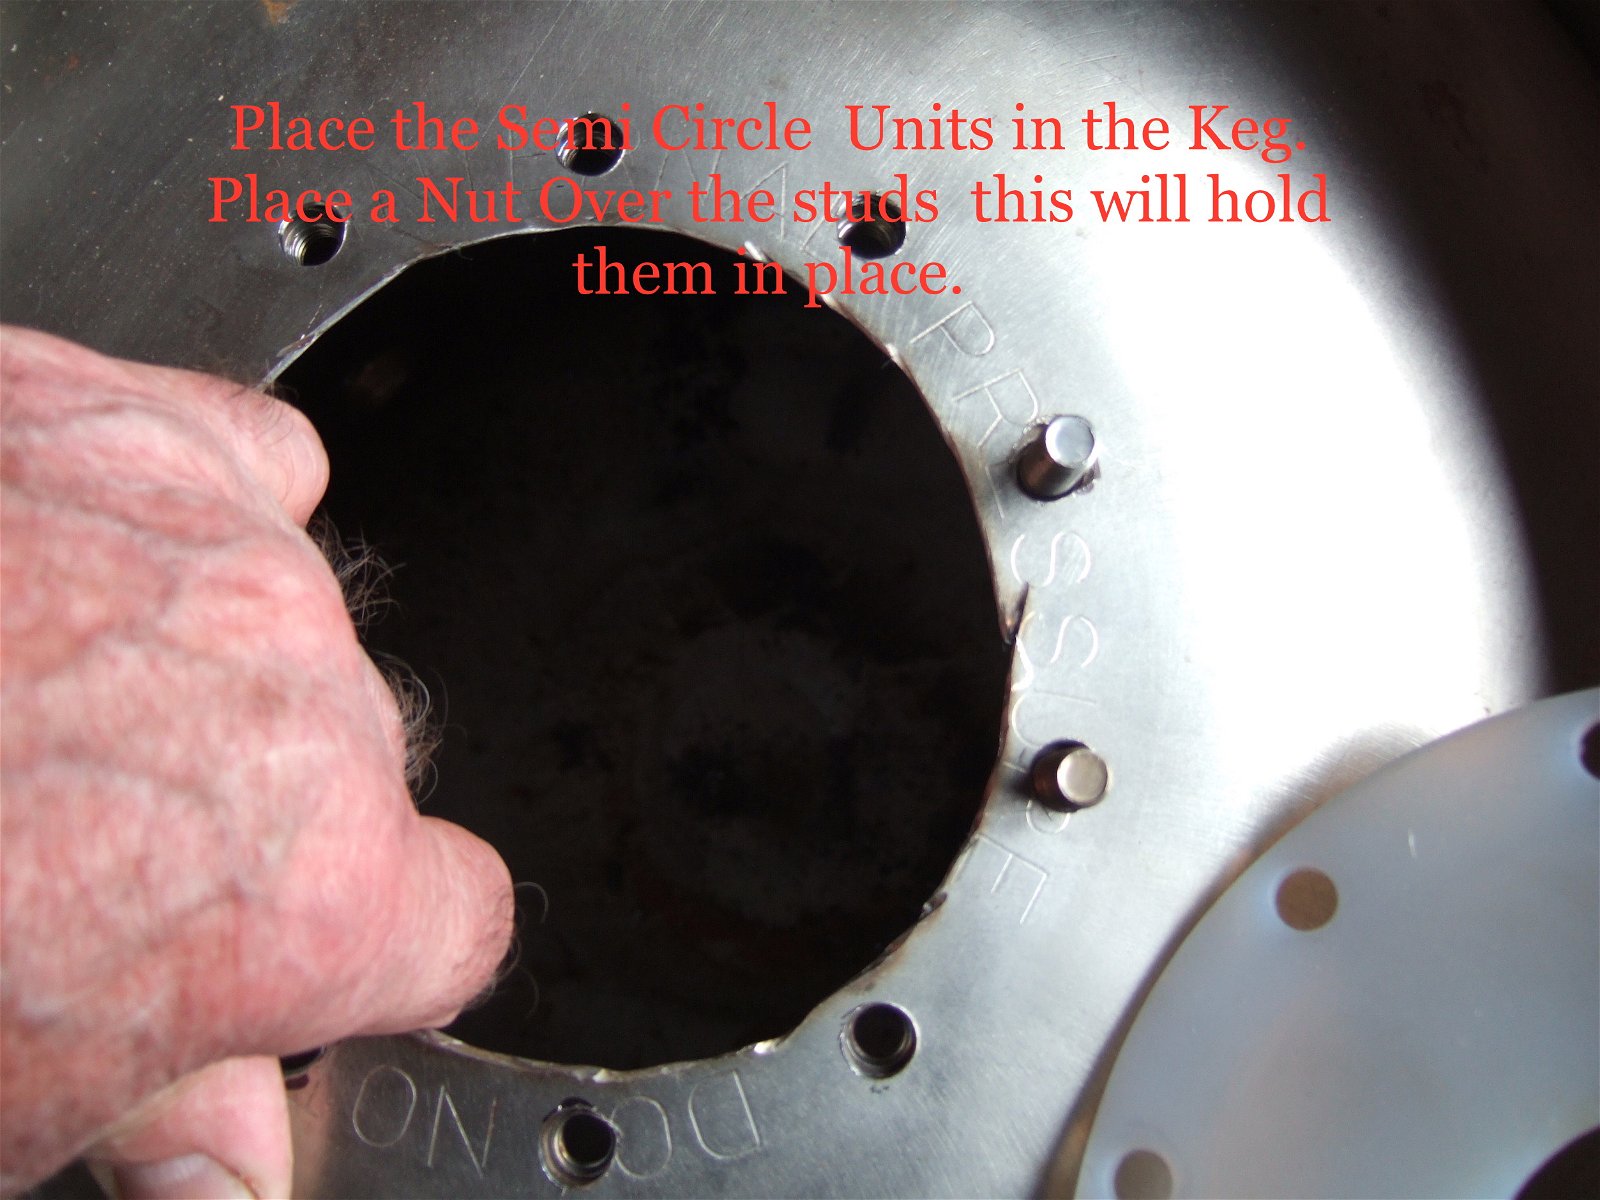 Mark and drill the holes using the adapter as a template.
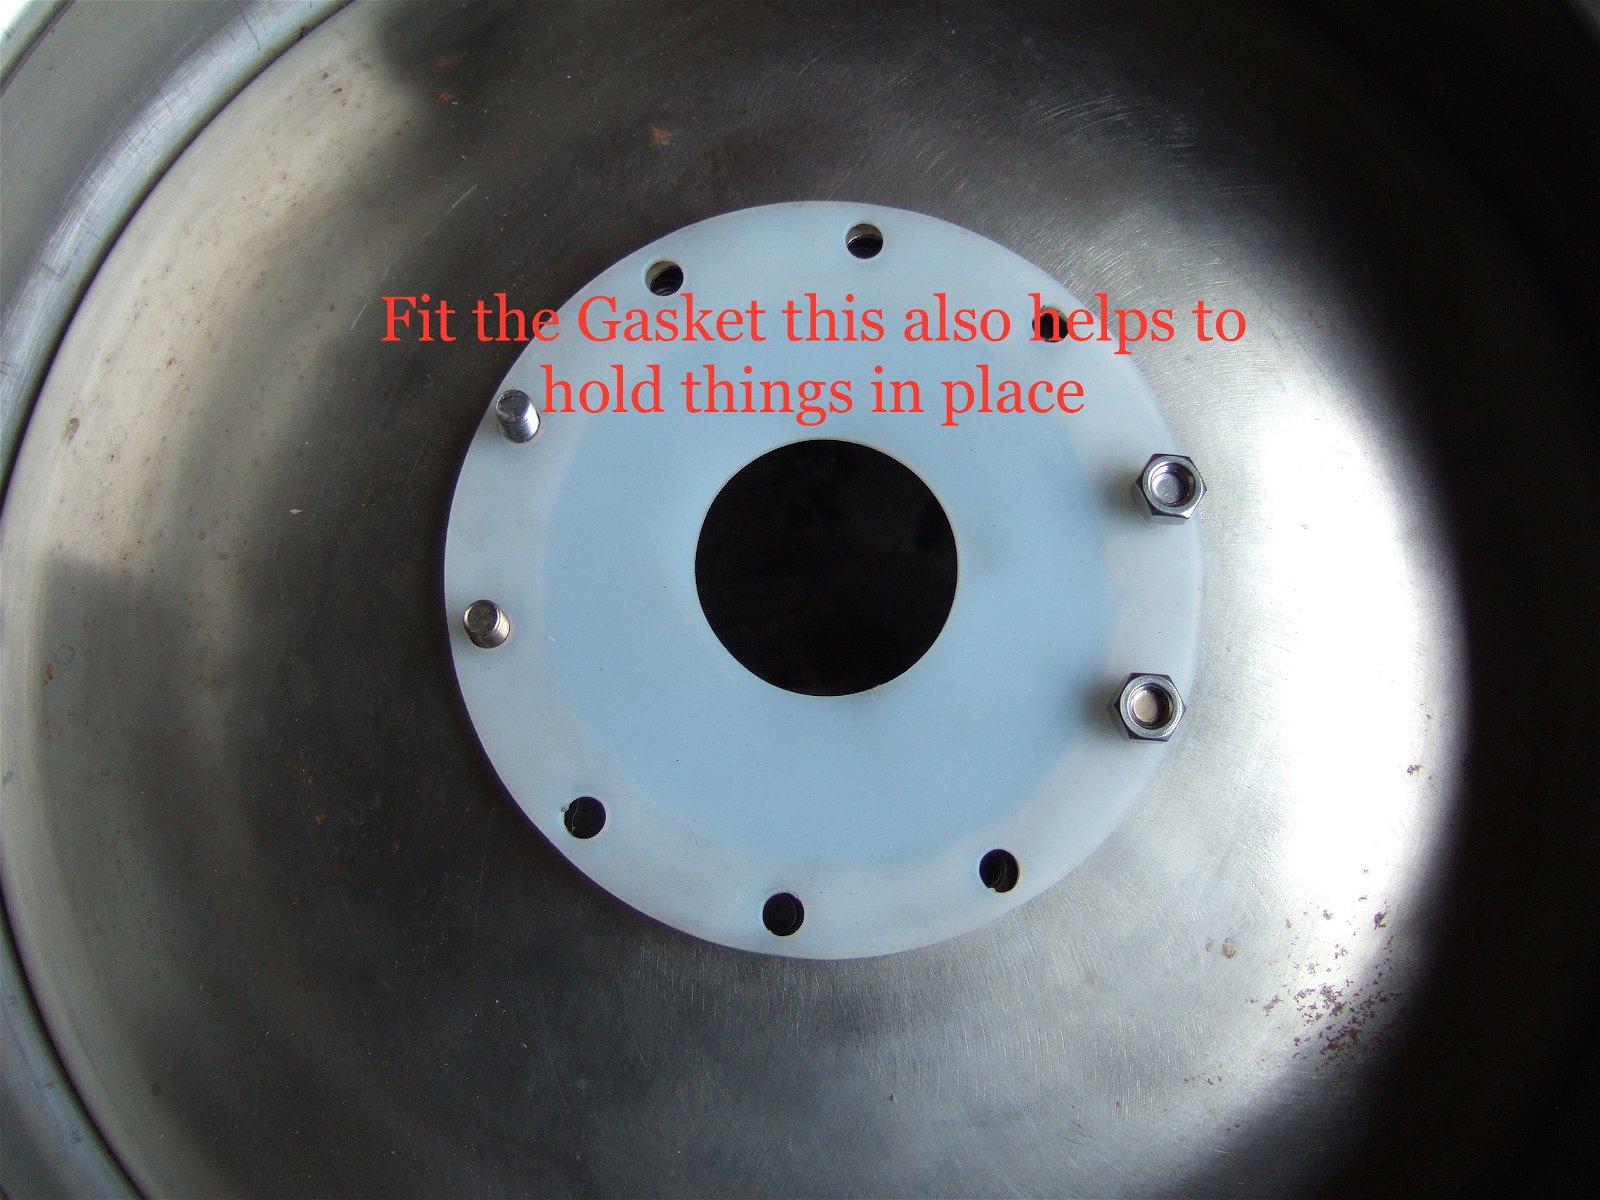 After fitting the inner rings fit the Gasket using a couple of nuts
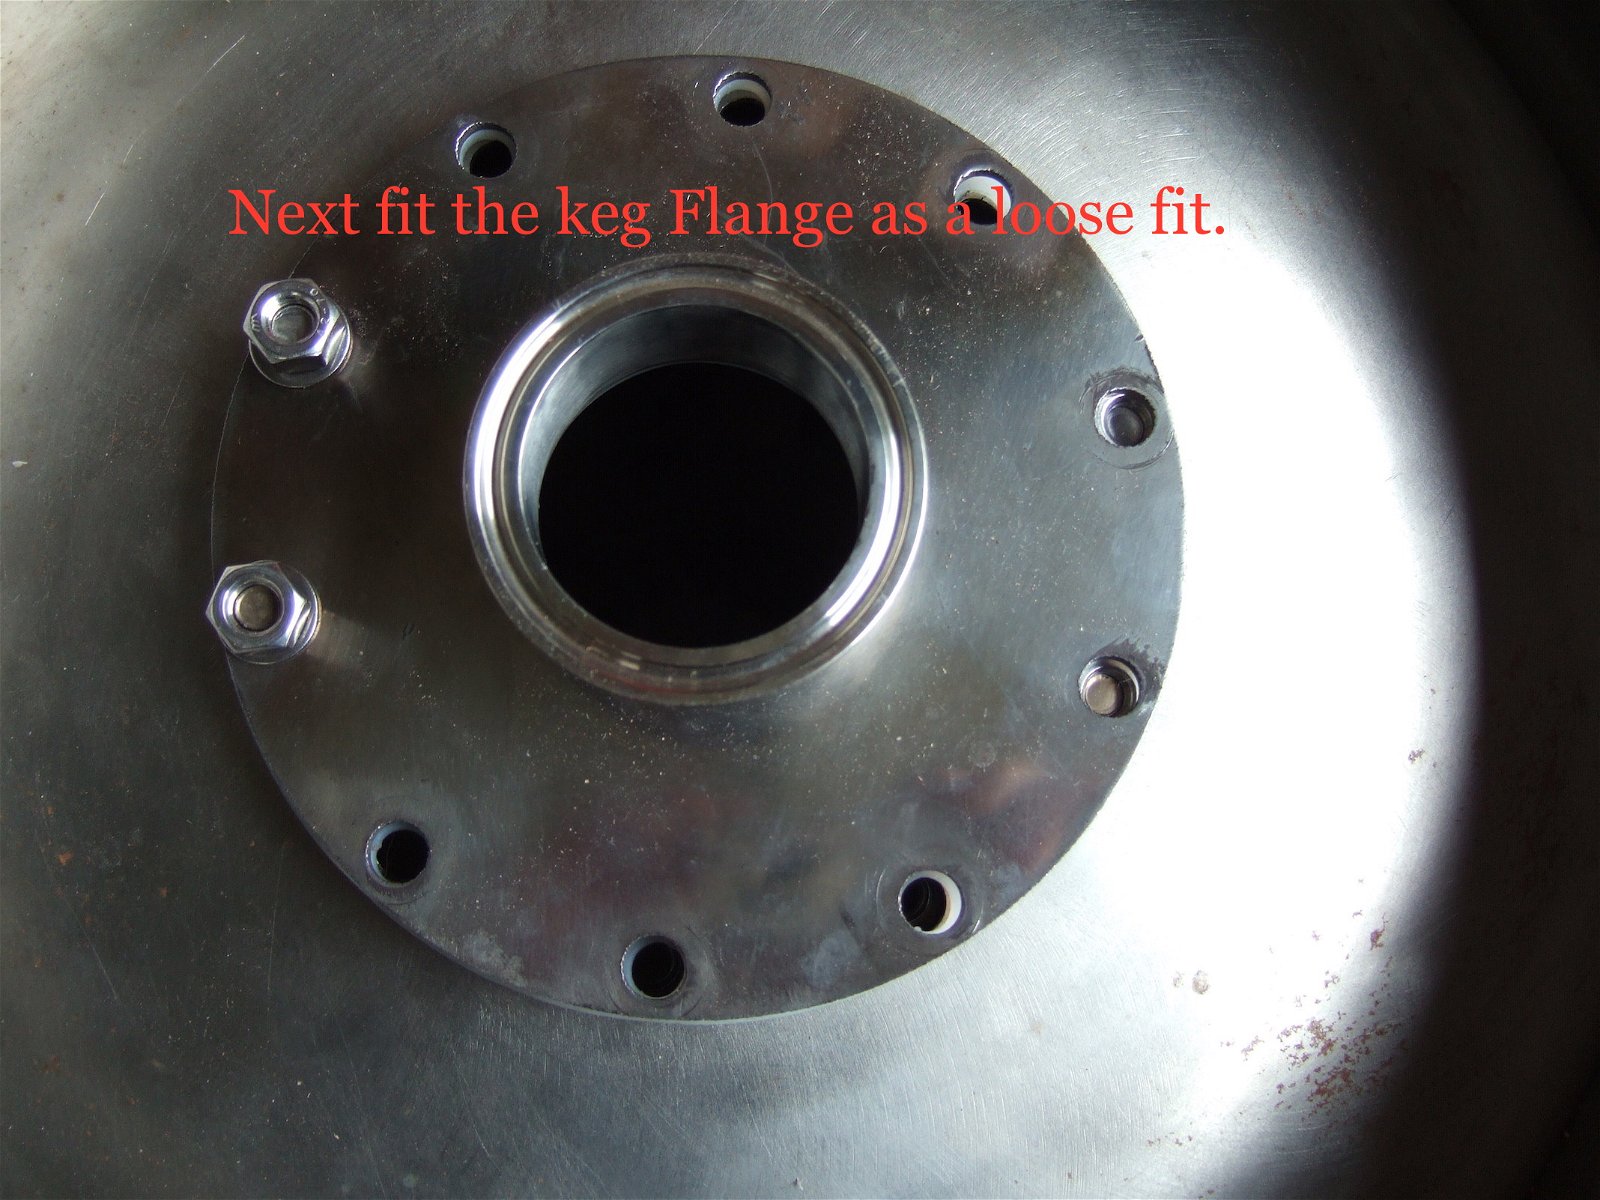 Loosely fit the Flange
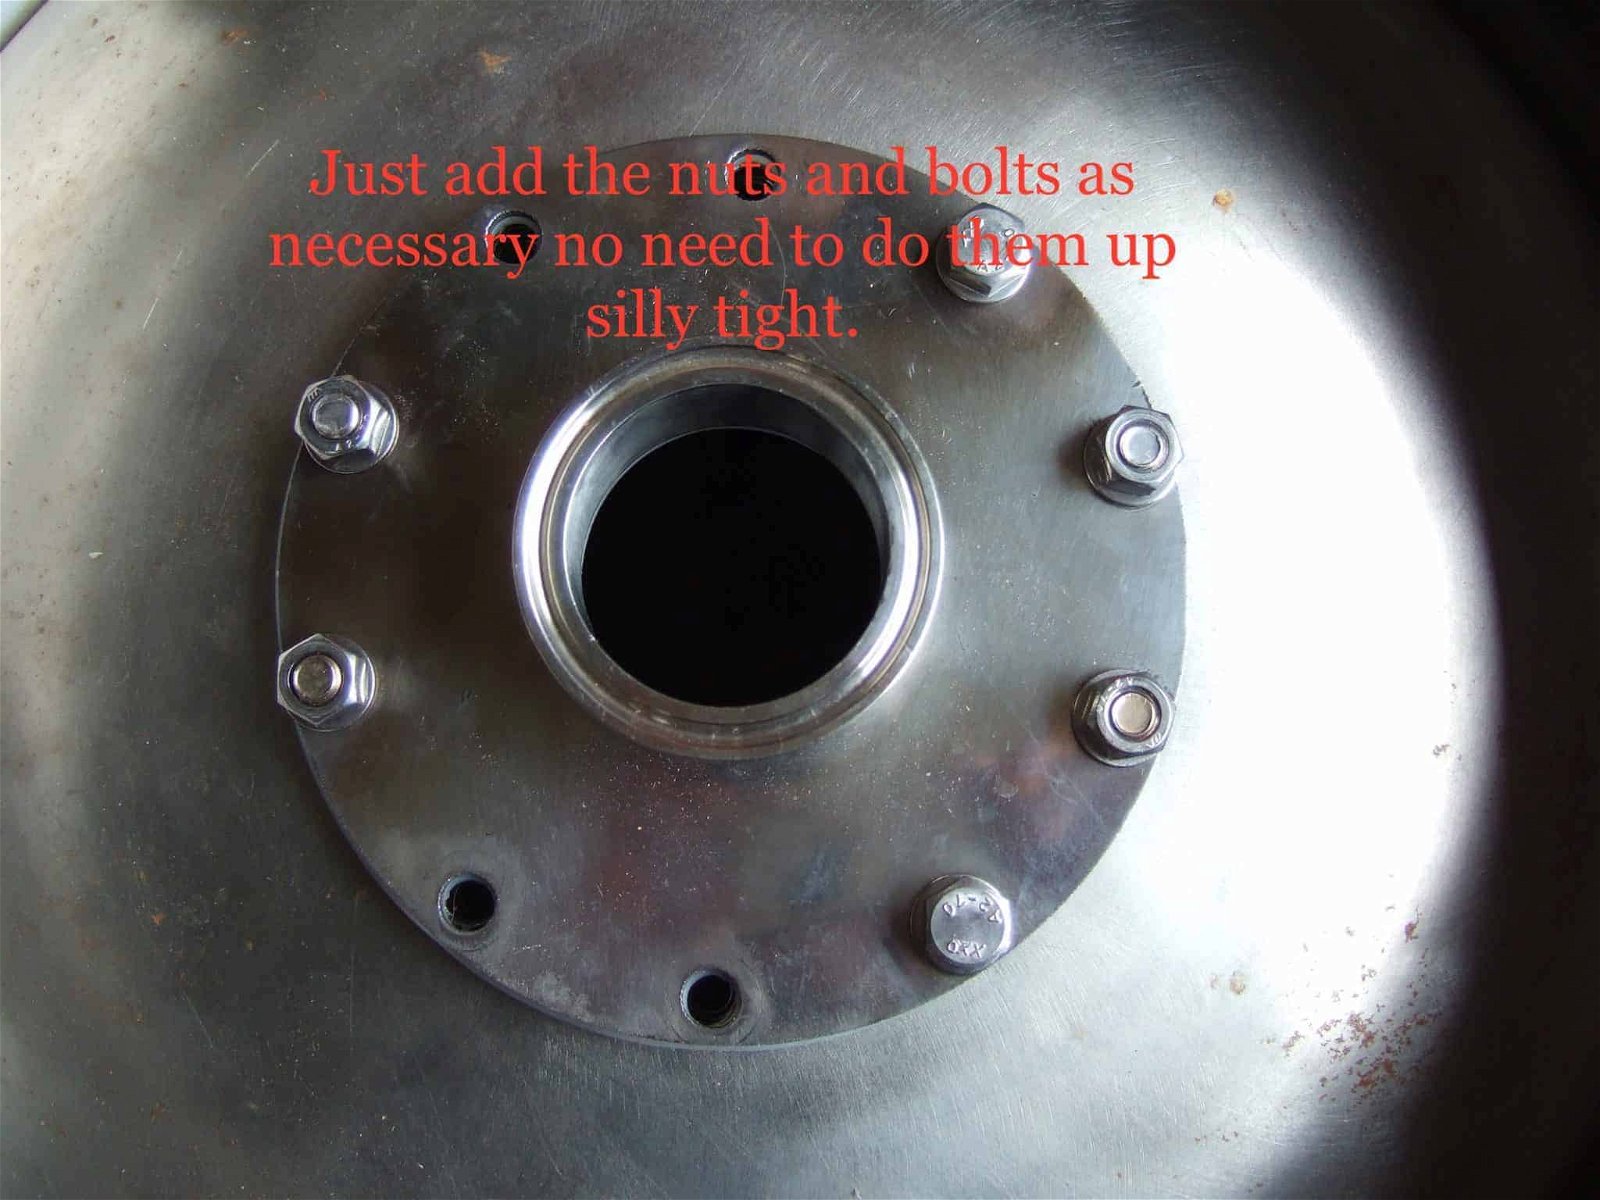 Continue adding fixing until they are all in position before tightening
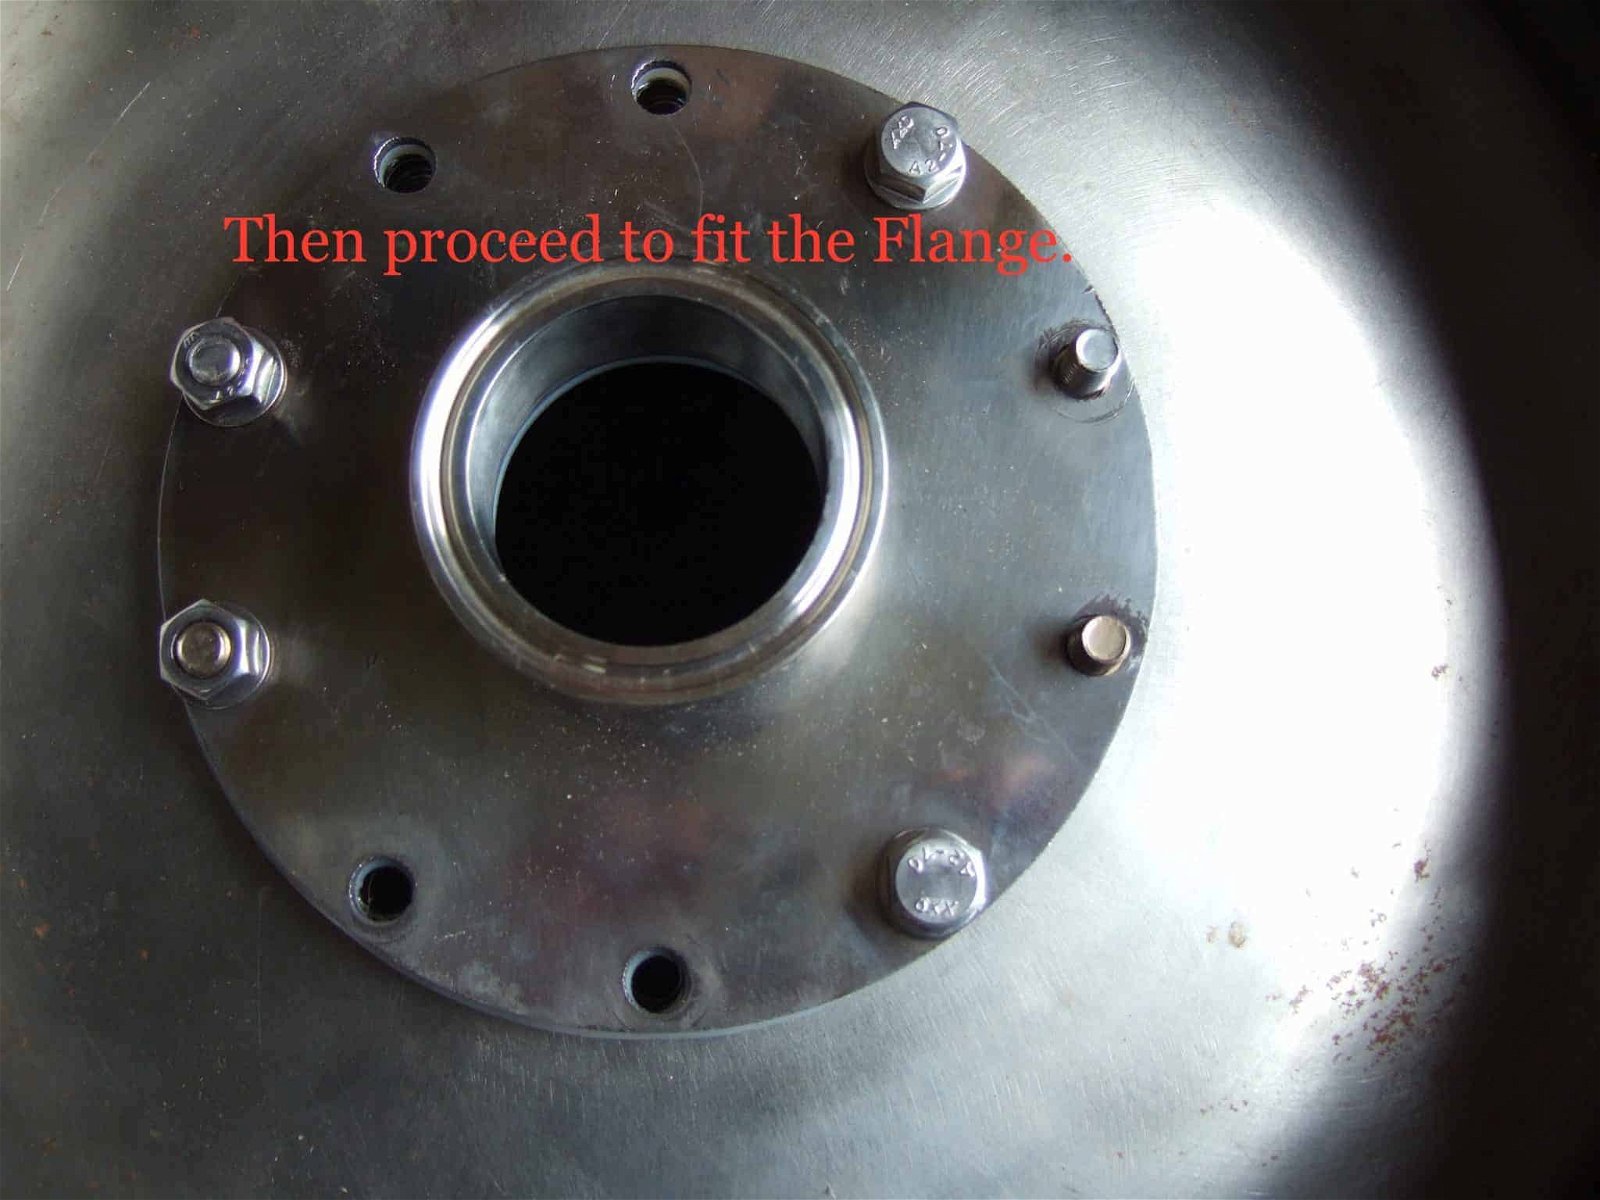 Add the nuts and bolts as you go
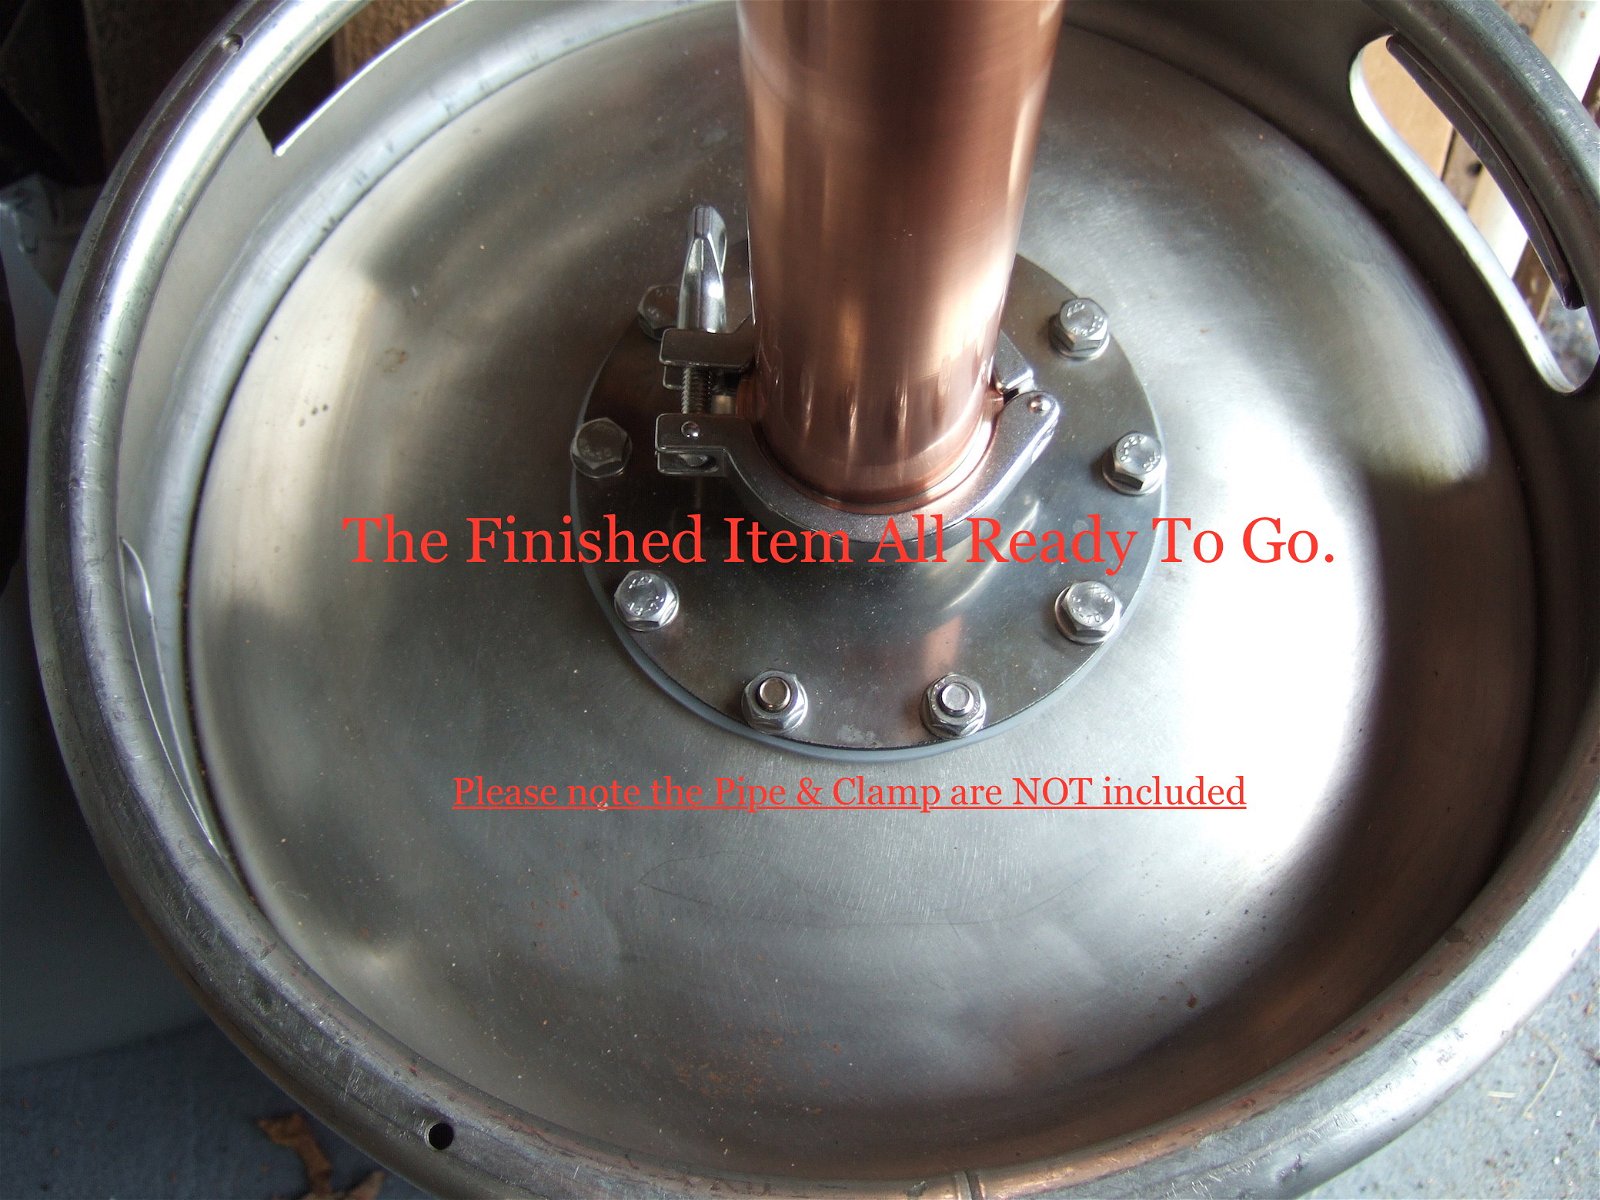 This is how the completed Flange should look when complete
( Shop )
Stainless Steel Brew Pots or Stills.
These are what you make them. They make nice Brew Pots / Mash Pots / Tuns. They also make a nice Still. This in turn can be fitted with all the usual attributes such as elements, drain taps, thermometers, sight glasses, lid clips, seals, etc. Another advantage is they are a lot easier to work with and keep clean than beer kegs. The lids on these pots have a single center screw so there is no welded-on handle to remove. The center where the handle fits the lid is an ideal size for a 54mm copper pipe union that will take a 54mm copper still pipe so you are off to a flying start for making a still.
The only thing I would say just as a safety measure is although the handles are spot welded on I would not trust them on pots this size, when they are full of a hot liquid, fit a tap so you can drain them down before you move them. As a by the by a 50L pot with 35L of liquid in comes out at 37Kg as 1Lt of water weighs in at 1Kg + the weight of the pot.
I have only bought a few to see how they go. I will not be buying any more. They would be better collected but if this is not an option I will post them. P&P will be around the £20.00 mark.
Unfortunately, these pots have not turned out to be what I was expecting when I purchased them. They are thin wall pots. Ok easy to work but not the best quality.
5/. 33L @ £55.00 each + P&P Measurements are 40cm High x 40cm in diameter.
5/. 50L @ £65.00 each + P&P Measurements are 45cm High x 45cm in diameter.
3/. 71L @ £75.00 each + P&P Measurement are 50cm High x 50cm in Diameter.
 Stainless Steel Brews
50L, 71L,
( Shop )